My Dream Tailored 90s/early 2000s Closet Inspired by Charmed
Join me on my quest to create the perfect tailored 90s closet inspired by the iconic Charmed TV show and the beloved character Phoebe Halliwell. Discover tips and tricks to re-create your own versions!
B
4/7/20267 min read

Growing up one of my favorite shows was something magical called Charmed. I was fascinated the first time I saw it that I ended up binge watching it on Netflix in the span of a couple months. Everyday I came home from high school I would rush through homework and then play an episode (or 3) of Charmed.
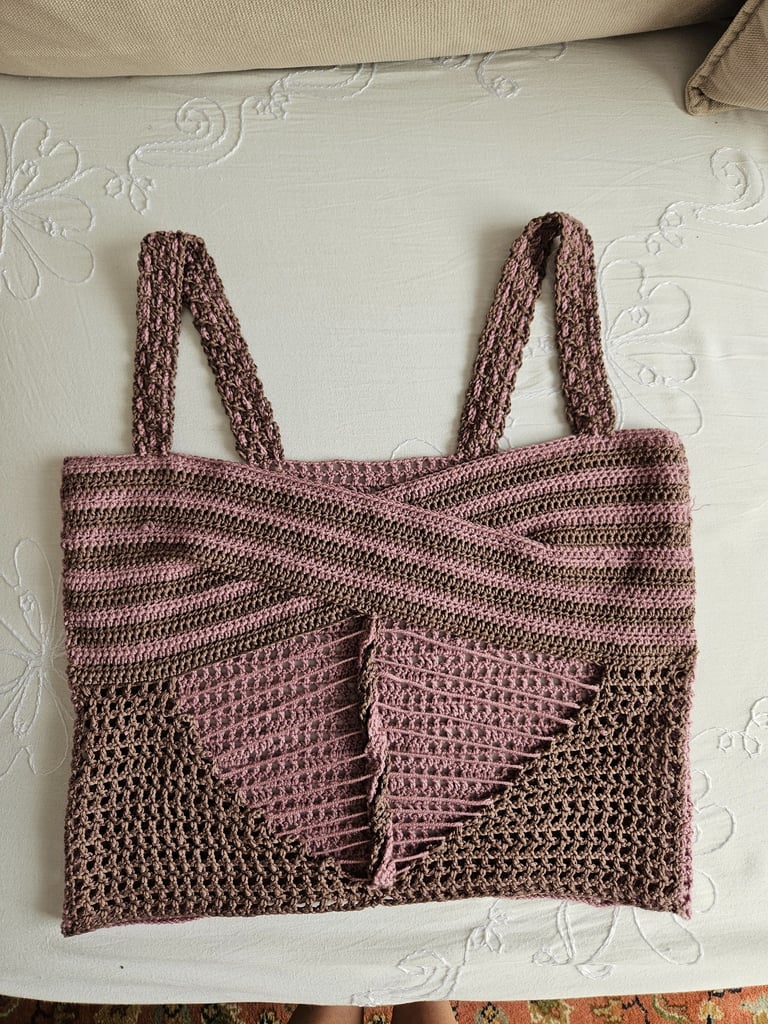
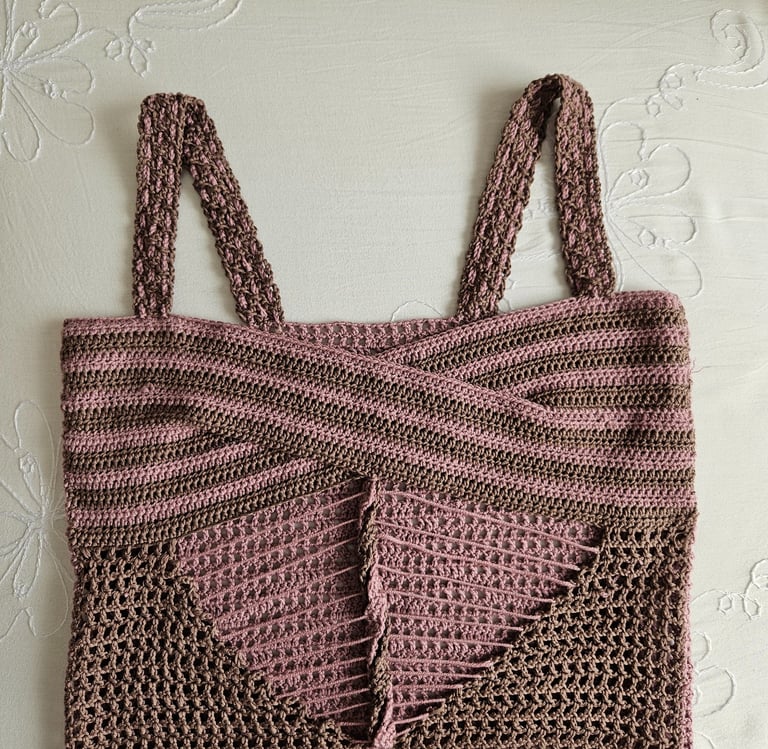
Front - Top Portion
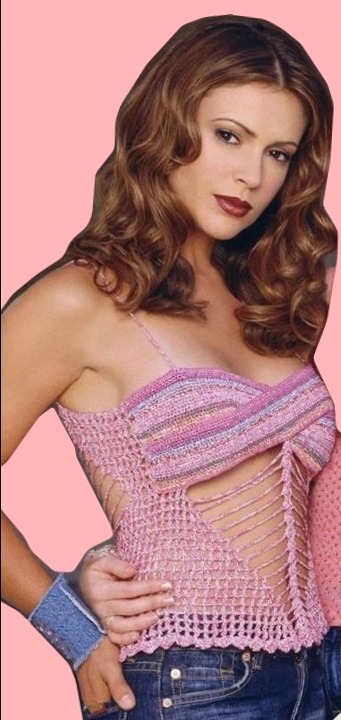
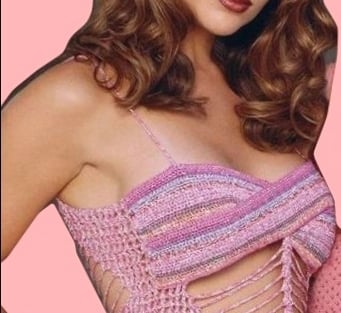
The Inspo: A crocheted top worn by Alyssa Milano for the Season 5 promo photoshoot.
I always loved this shirt, I saw it floating around Pinterest so many times and recently I finally decided to try my hand at making something inpsired by it. My first step was breaking down the shirt into it's components.
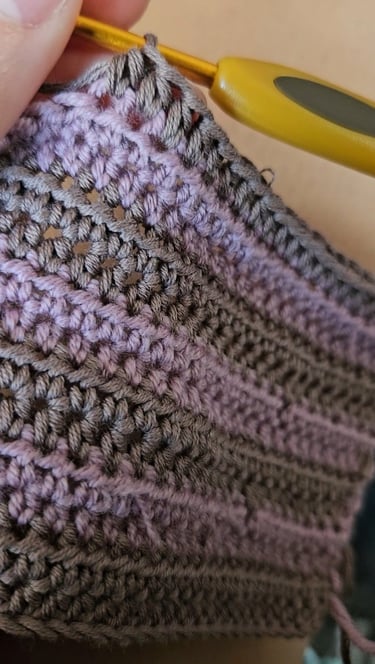
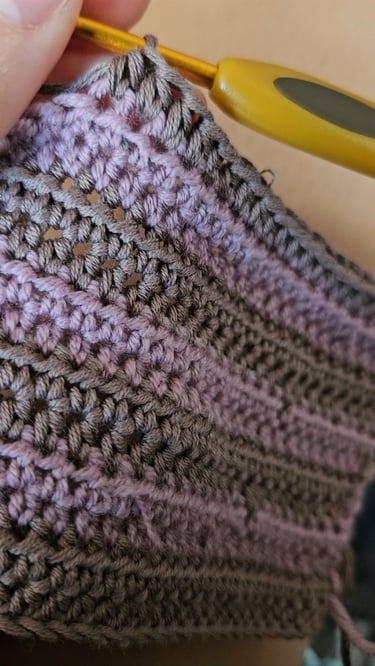
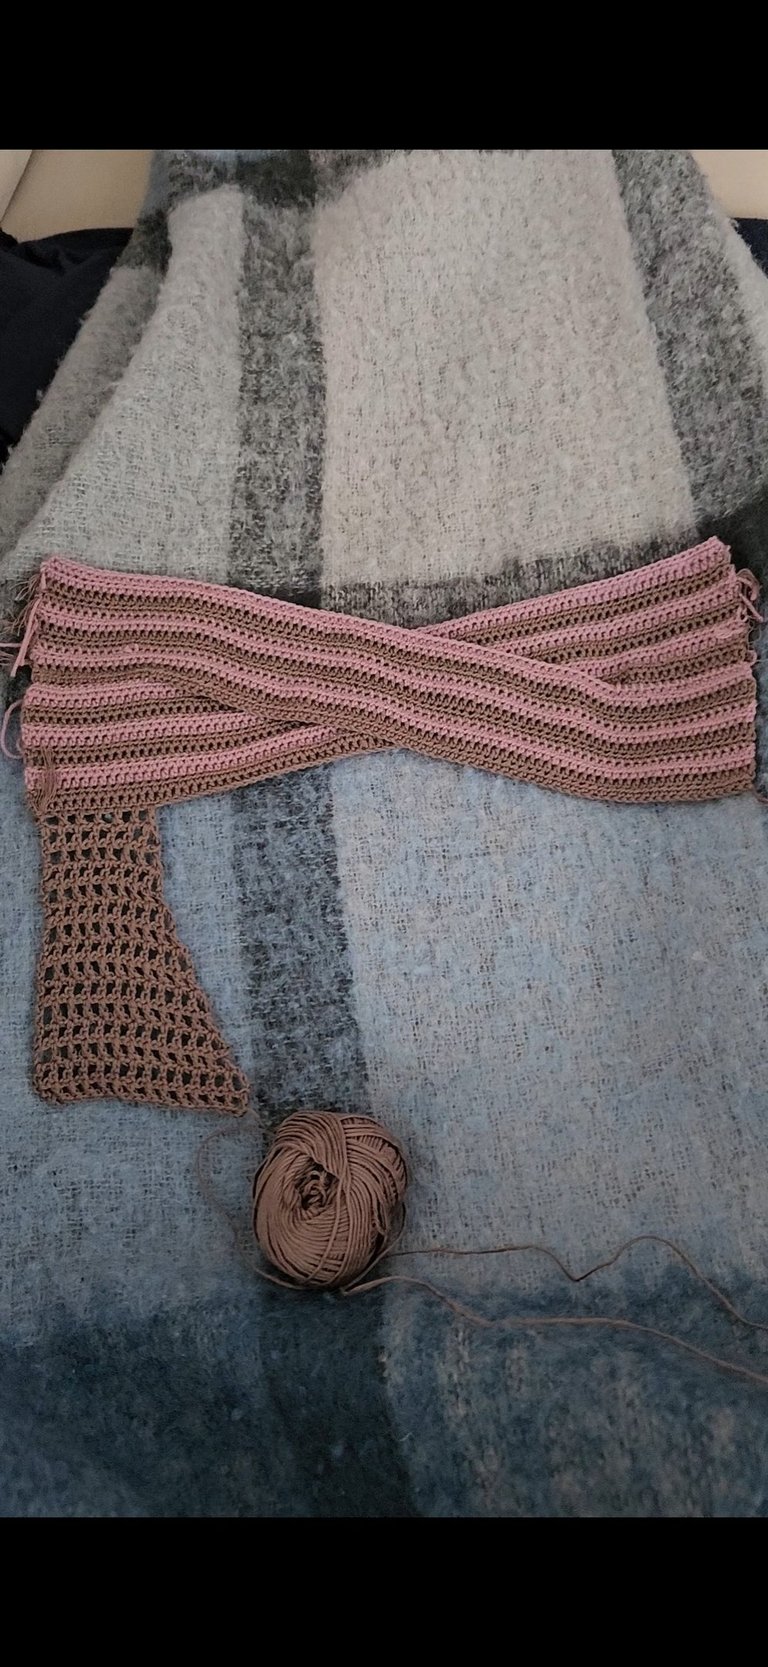
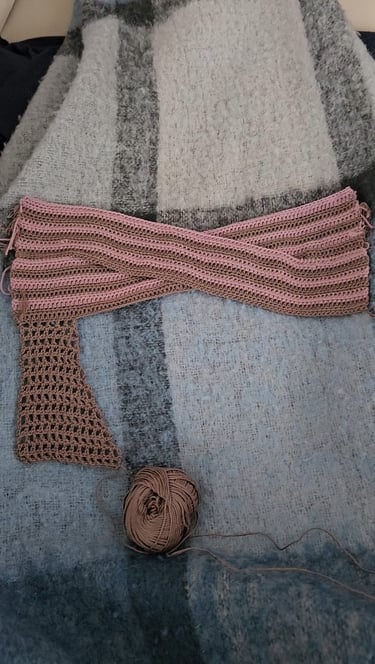
I started with the strip that goes across the front, arguably the most important piece to make this wearable. I decided to keep it simple and only use the two colors that I bought. I didn't want to loose the color stripes however, so I alternated two rows of half double crochet of each color. The width of this piece goes from under my arm on the right, across the front and under my arm on the left. I tried to make the width about halfway around my body so that making the back would be easier to measure as well.
Now how did I come up with the idea? Well the local yarn store had some beautiful yarns in their discount bin one day and naturally I bought them before I even knew what I was going to with them.
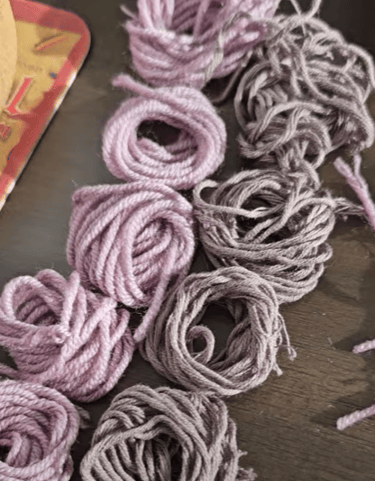

The yarn colors in question, I of course forgot to take a picture of the yarn just by itself. The darker color is Natura Just Cotton in # 39 and the pretty pinkish color is Mondial Extrafine in # 0725.
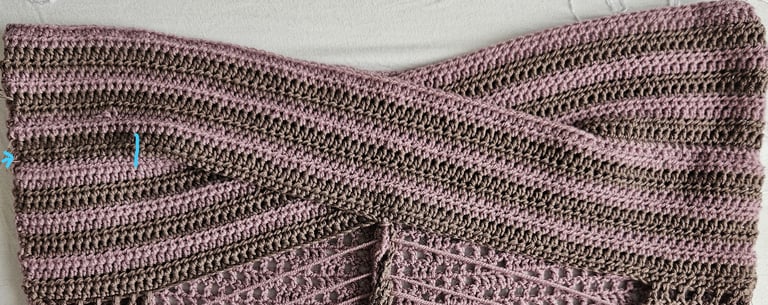
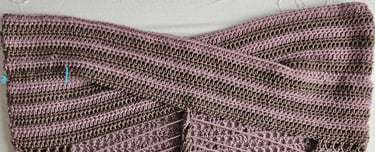
I put the two pieces together (best to measure this against yourself). I stitched the two together with a yarn needle and left a long piece of the yarn hanging to make adjustments. This would help me take into account the pull of the straps once they were added. (From the blue arrow to the line is where the two pieces are sewn together.)
Also remember to measure with AND without a bra. I may have made the mistake of forgetting to take into account the slight size difference that makes...oops. I could have made it a little longer since no matter what bra I wear now you can see a little bit of it peaking out. It doesn't bother me, just wish I had taken it into account to be able to wear with my comfier one.
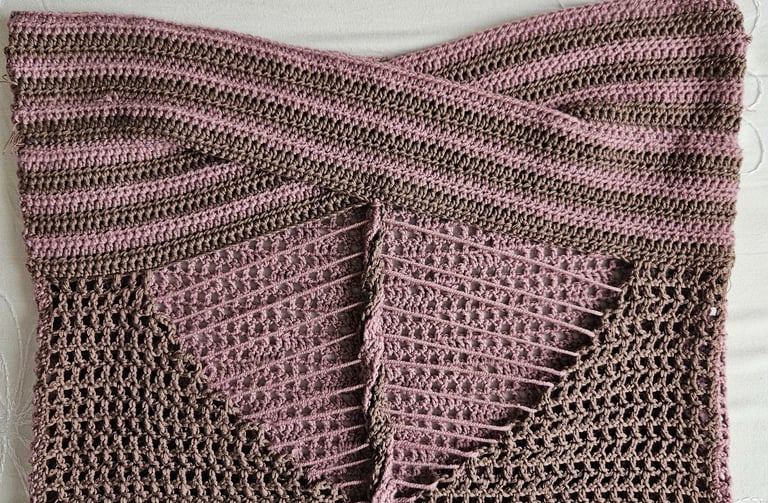
Next was figuring out the the rest of the front shirt, the filet crochet was rather easy. I started by attaching the filet crochet to the bottom of the front cover piece. The left picture was before I figured out how to increase the filet crochet on every row. You can see the slope was not great enough to reach the middle of the front cover without getting too long. On the right picture I increased the filet crochet on every row, making the whole piece much shorter while reaching the middle.
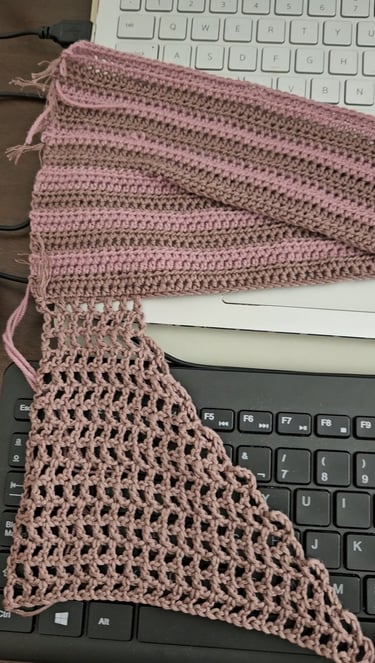
Thinking back on it, it might have been easier to decrease filet crochet stitches rather than increasing them. But I did get the desired results.
Front - Bottom Portion
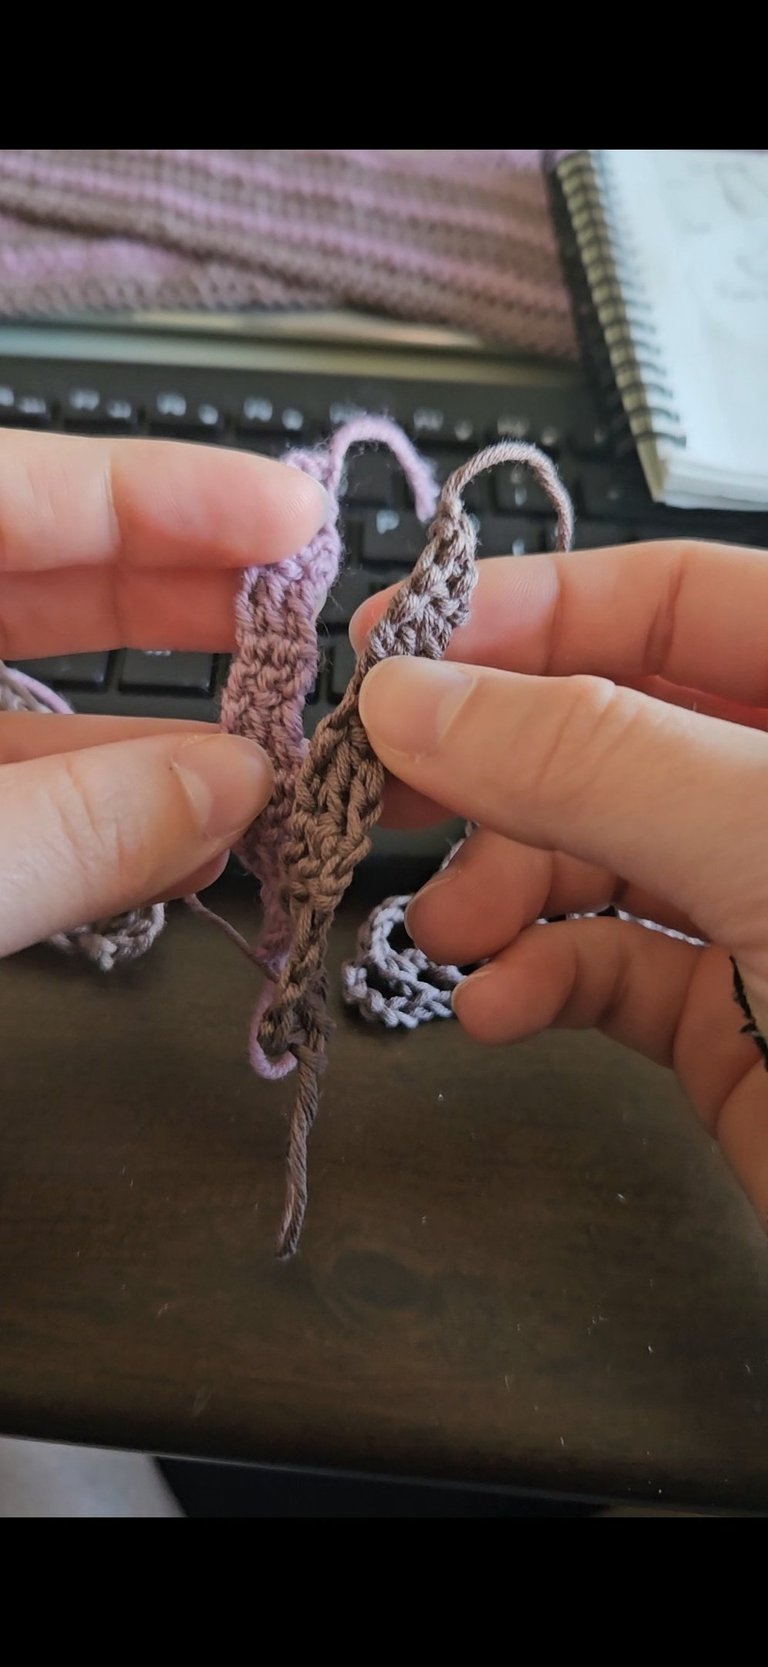
I knew the middle part would be a little tricky. It kind of looks a little bit like a spine which I was digging. The main thing I was concerned about was the way it was laying. I can tell the yarn used is a little heavier then either the cotton or wool yarn I had. I also just had not idea how to make the thick middle section. It's very hard to tell what was initially done and there aren't any other pictures to compare it to.

I did know that I wanted to use both of my yarn colors in that thick middle section. I initially tried to do a flat strip of double crochets, with each row having 2 double crochets of the brown and 2 double crochets of the pink. I do not have a picture of that because I undid it all after the second row. It was not coming out the way I wanted it to so I scrapped that idea. Then I tried just a strip of one color with only 2 double crochets per row. It ended up curling by itself and gave me the idea to put two of them together to make a little twist.

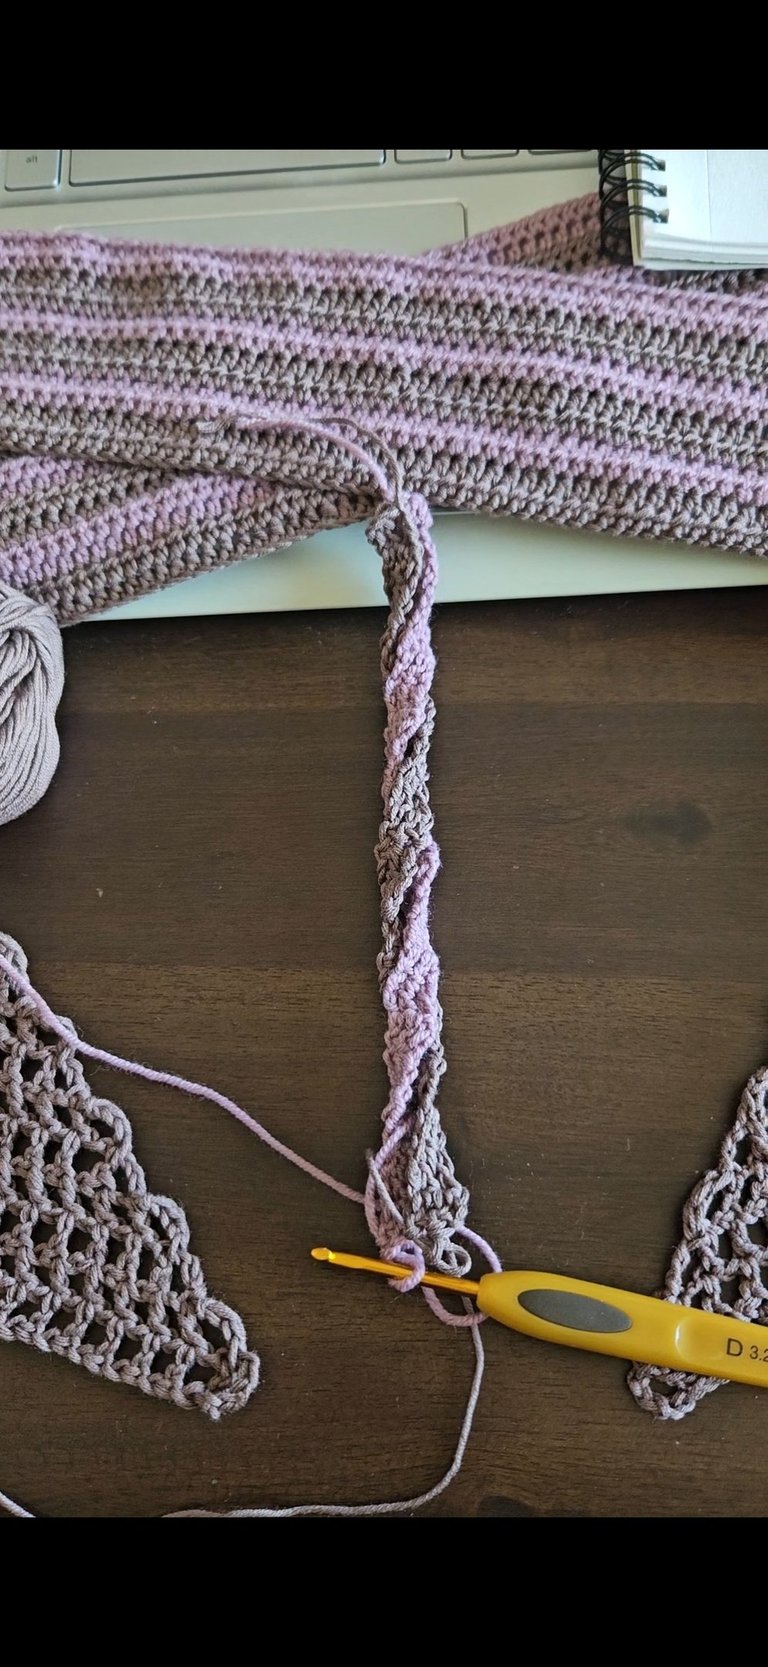
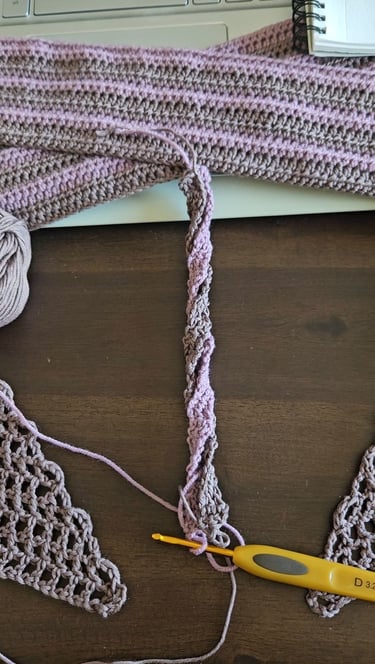
To finish up the front, I was debating which yarn to use to create the little lines that connected the middle twist to the edges of the filet crochet. The cotton is a heavier yarn which would look more drapey but I did end up using the wool. It seemed like a better choice color wise. (I'm still debating whether or not to add a little chain to it)
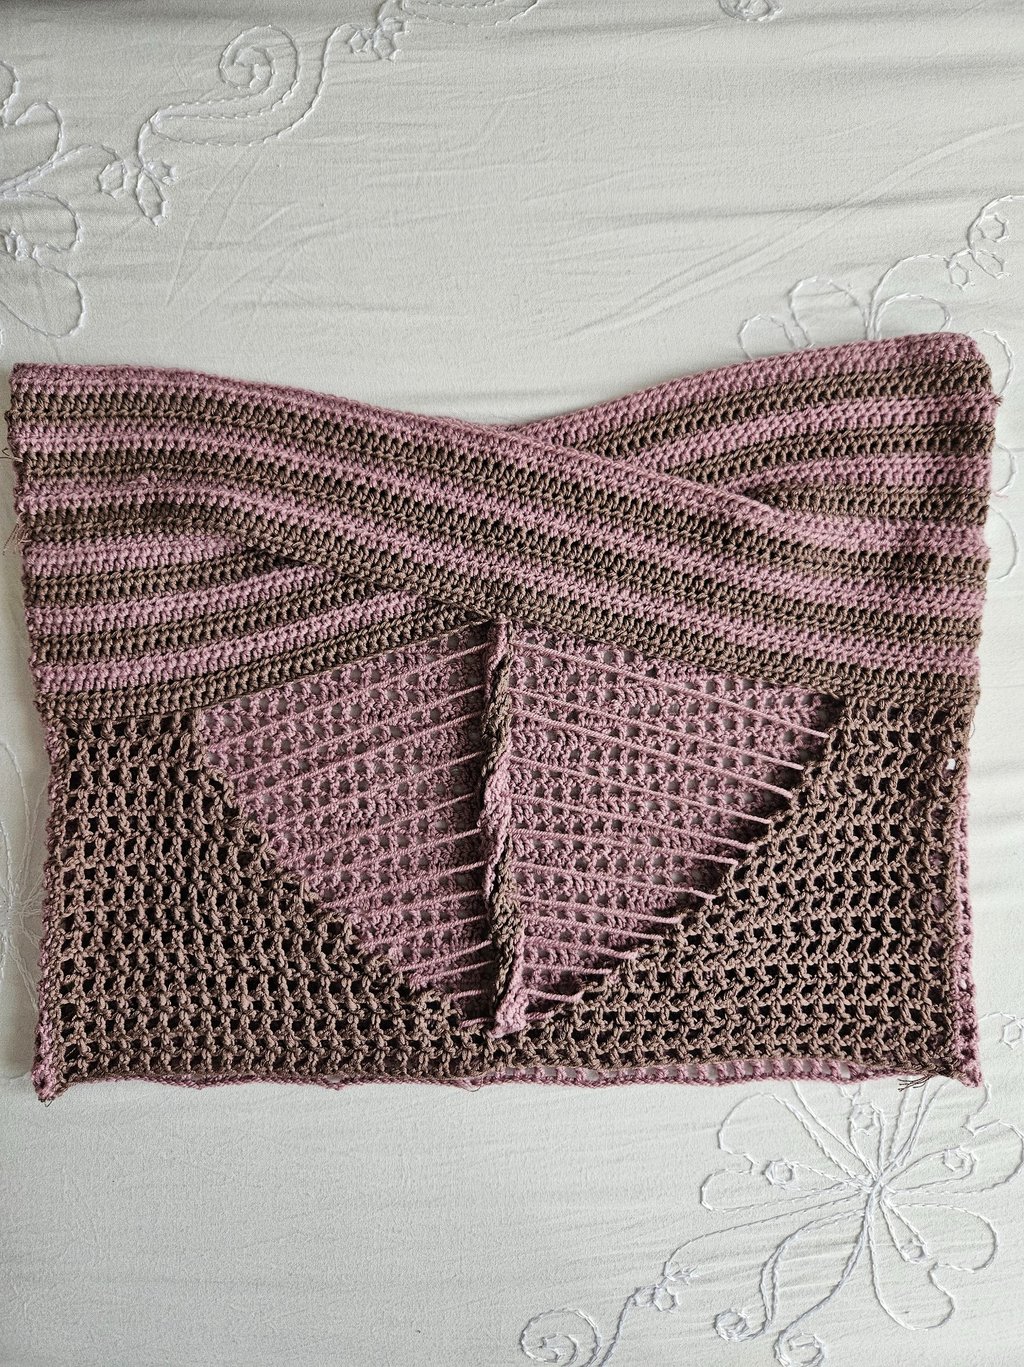
Back - Whole Panel
Now if you look closely at the picture of Alyssa Milano in the shirt, you can see that the back seems to be the same concept as the front. There is a filet crochet grid with the same strands of yarn, it just seems to be reversed with the wider part of the design down towards the mid back. I didn't really want my back to be that open so I decided to just play with some filet crochet patterns.
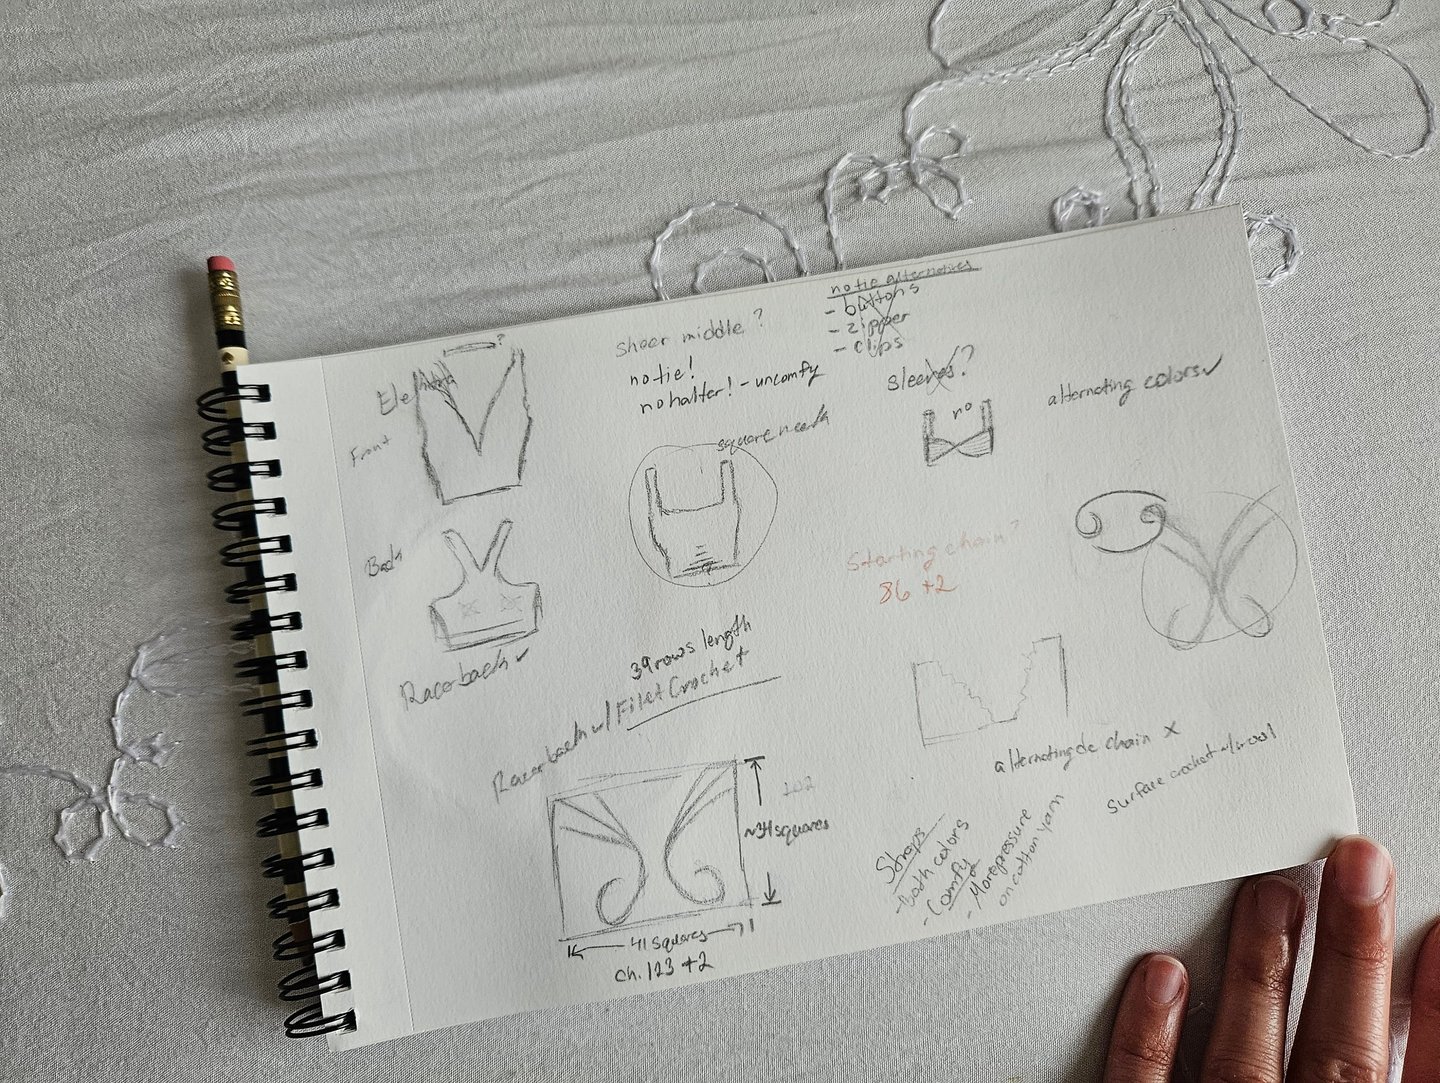
I was originally thinking something along the lines of atrological symbol for cancer but i didn't like the way it was coming out. So I played more with the idea of creating some type of wings and settled for more of a butterfly wing design.
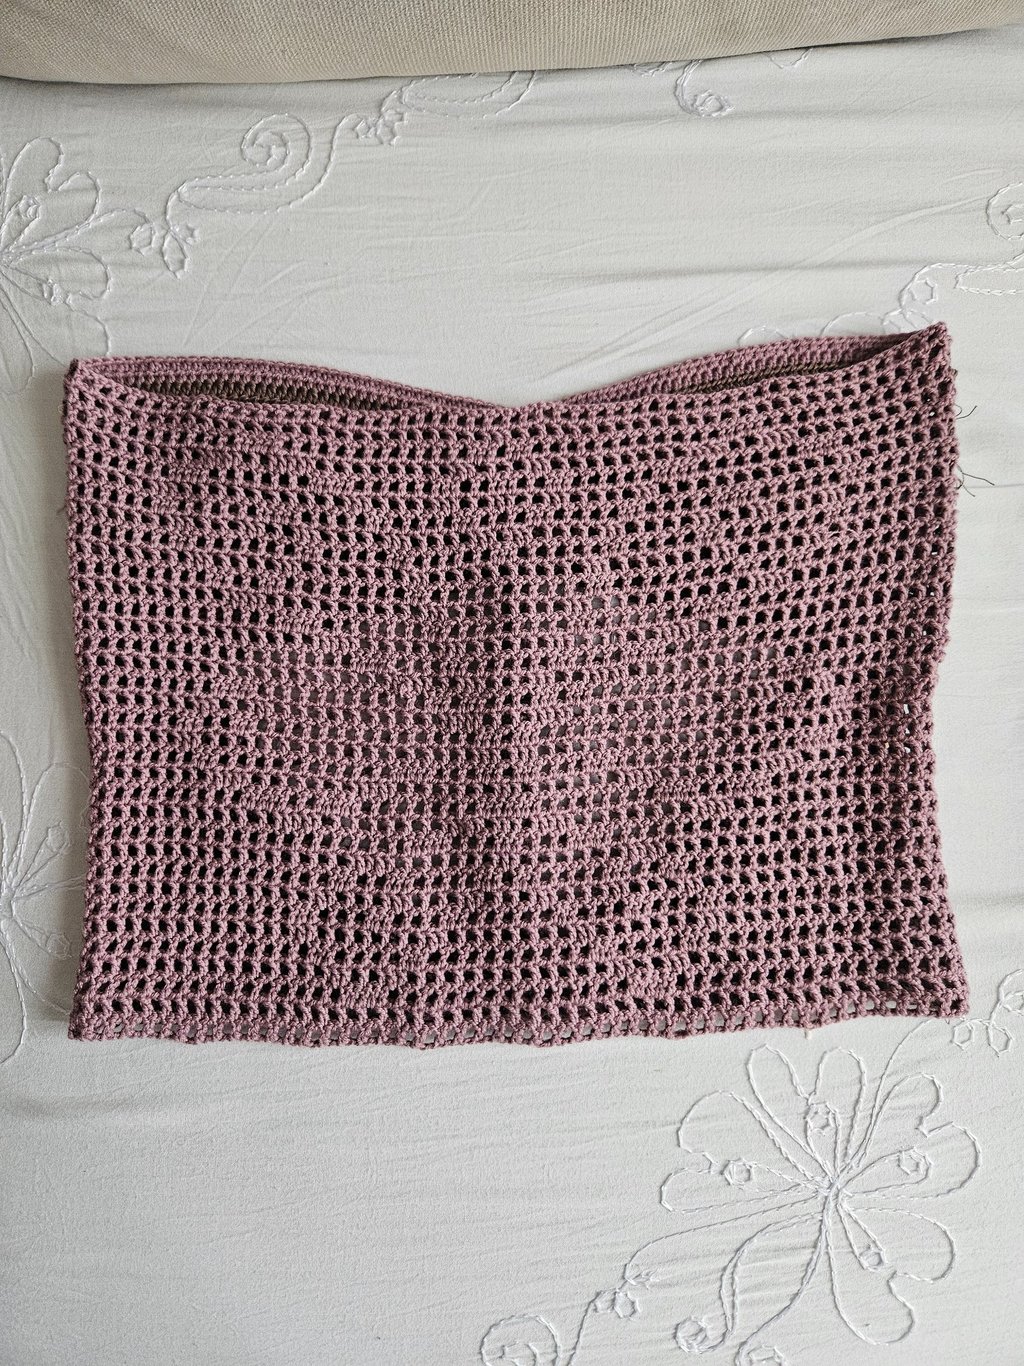
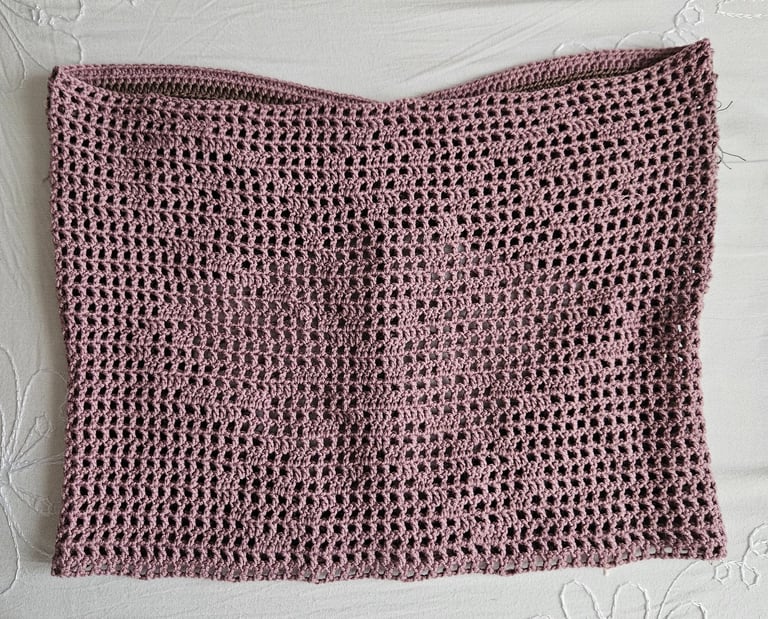
Instead of using 3 chains to make one square, I used 2 so that I could get more squares into the pattern. Nothing too crazy with the one. I blocked both (or all three rather) of the filet crochet pieces so that they would set nicely and I had a more accurate sizing of them. I did not block the strips on the front, it just didn't seem necessary and the half double crochets don't tend to stretch out much when washed so I just left it be.
Straps
Lastly, the straps. I do not like those tiny little straps that dig into your skin. I may not have that big of a chest but I am tired of dealing with those things. So I had to try and come up with something that would look nice but still be a little thicker for comfort.
These were a bit of a pain in the butt to tie down. I didn't want the ties to be seen through the filet crochet but I still wanted a secure knot. (The shirt stretches when I pull it over my shoulders and I don't want to be fixing these little things every summer.) If you're interested you can the knot I used called the Double Back Stitch here (number 5 in the list).
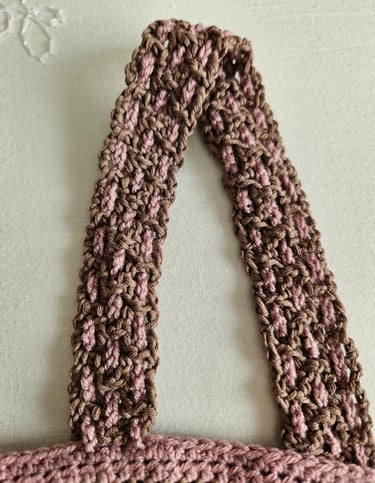
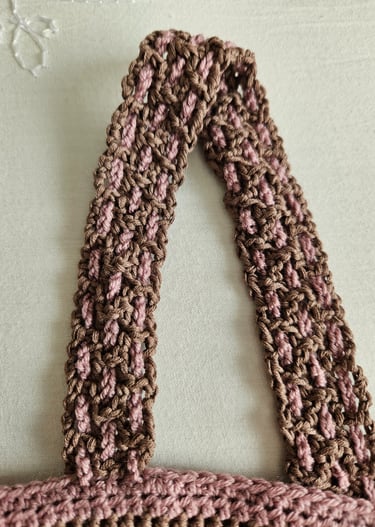
I decided to continue with my slight filet crochet obsession and make the straps 3 squares in width. I then made chains out of the pink wool and slipped them lengthwise in between the squares to add some color and a little texture to them.
I used the bra that goes best with the front strip (as previously mentioned) to measure where to put the straps on the shirt. I had my boyfriend pin them on the back for me. I used not only the starting/ending extra yarn from the brown yarn but I additionally used the extra yarn from the chains to weaved it deeper into the piece for a more secure hold.
I'll take some photos of what it looks like when worn soon! My health and the weather took a bit of a turn for the worse, spring can be beautiful but half the city got sick and the clouds decided to hover over us for a week. I'm also trying to figure out how to put a comment section on here but if you have any questions you can also find me on any of the social media accounts linked to the page :)